Pro Tools, AVID/Digidesign’s benchmark digital recording software, is synonymous with the production of hit records. Since its introduction into the professional recording industry in the mid 90’s, Pro Tools has remained a frontrunner for audio production. When Pro Tools was introduced in 1991, four channels of audio were available at a price tag of $6000. Thankfully for us, Pro Tools’ capabilities continued to grow alongside the steady advancements of computer technology. As the audio industry began to stray away from major recording facilities, into home studios and bedrooms, Digidesign began developing Pro Tools systems that catered to all levels of audio production. Today, Digidesign offers Pro Tools systems affordable on nearly any budget. In this article, we take an in depth look at three levels of Pro Tools studio systems: The M-Box studio ($250-$1000), The 003 studio ($1200-$2,500), and the HD studio ($10,000+). We will also discuss some important add -on’s that can be a great addition to any Pro Tools System. These include, system upgrades, a master clock source, converters, and control surfaces. First, let’s check out the hype behind the Pro Tools software and the advancements in Digidesign’s latest version, Pro Tools 8.
Introduction To Pro Tools
Pro Tools is a Digital Audio Workstation (DAW). A DAW is comprised of two elements, audio recording software and audio conversion hardware. The software allows for recording, editing, mixing, and midi arrangement. The hardware provides analog to digital and digital to analog conversion of the audio. Pro Tools LE software requires a Digidesign hardware interface in order to operate. Pro Tools HD utilizes Digidesign PCI cards for processing and uses a separate hardware device for conversion.
The Pro Tools workspace is comprised of two main windows. Mix and edit. The mix window contains a vertical channel strip for each track in the session. It is set up much like a typical mixing console. Each channel has inserts, busses, input/output selections, a pan pot, record enable, solo, mute, and a fader. The edit window contains the same options as well as waveforms for each track in the session. The edit window allows you to view the waveforms for each track, edit and arrange the audio, as well as set up markers, and control the transport (play, stop, rec, etc). The editing workflow is one of the most impressive aspects of the software. There are several tools and editing modes that make editing and arranging a breeze. Pro Tools offers a number of playback and record options as well. These include: loop playback, punch record, and loop record. The software also provides comprehensive midi and video capabilities.
In the latest version of the software, Pro Tools 8, Digidesign maintained their user-friendly workflow that helped to make the software an industry standard. There are several new features such as elastic audio, the off spring of the popular audio quantization application, Beat Detective. They have also added more tracks for LE systems (48 mono or stereo), several virtual instruments and plug-ins, and a hip, new design for the workspace. Now, lets take a look at the options for Pro Tools studio set-ups.
Mbox Series ($250-$700)
The Pro Tools Mbox series hardware is a great option for those who are looking for a simple, portable device for recording. The price for these interfaces range from $250 to $700 and includes the latest Pro Tools Software. The latest Mbox hardware consists of the Mbox 2 micro, Mbox 2 Mini, Mbox 2, and Mbox 2 Pro.
The Mbox 2 Micro is a 24bit/48k, output only USB device that is about the size of a jump drive. It was designed for engineers who want the ability to work on sessions anywhere. There are no inputs on the device. It is equipped with a 1/8″ jack for monitoring.
The Mbox 2 Mini is 24bit/48k, 2 channel USB interface. It is a great option for new Pro Tools users or songwriters who want a simple device for basic recording applications. The Mbox 2 Mini is equipped with one XLR input with 48v phantom power, two 1/4″ inputs, two 1/4″ outputs, a headphone output, and combined volume control. There are a few downsides of the Mini. It does not include a midi I/O or separate volume controls for monitor and headphone outputs.
The Mbox 2 is a 24bit/48k, 4in/2out USB interface. It offers a few more features than the mini. It is a good choice for someone looking for a basic interface that includes midi capability and more extensive input options. The Mbox 2 features two preamps with 48v phantom power, two analog inputs (XLR or 1/4″), two digital SPIDIF inputs, two 1/4″ outputs, midi I/O, a headphone output and separate volume controls for monitors and headphones.
The final piece in the Mbox series is the Mbox 2 Pro. It is a 24bit/96k, 6in/8out fire wire interface. The Mbox 2 Pro is a great buy for beginners looking to get into more advanced sessions and professionals who need a reliable device for remote recording. It offers two preamps with 48v phantom power, four analog inputs (XLR or 1/4″), two digital SPDIF inputs, six 1/4″ outputs, midi I/O, two headphone outputs, and separate volume controls for monitors and headphones.
The M Box series hardware is a solid option for mixing on the run, portable recording, and basic demo sessions. However, if you are looking for a more advanced device with the ability to handle larger sessions, the Digidesign 003 could be what you are you are looking for.
Digidesign 003 Series ($1200-$2500)
The Digidesign 003 is 24bit/96k, 16 channel Pro Tools interface. It can be found in countless project studios, as well as the B rooms of several major facilities. It is an effective workhorse, offering a wide range of amenities for those not ready to take the leap to HD. The 003 interfaces range from $1200-$2500.
The 003 provides four pre amps with 48v phantom power, 4 XLR inputs, 4 1/4″ inputs, 8 1/4″ outputs, 2 1/4 monitor outputs, 8 channels of adat I/O, word Clock I/O, midi I/O, two headphone outputs, and separate volume controls for headphones and monitors. The 003 also includes 8 motorized faders, led/lcd displays, solo, mute, record enable, and pan knobs for each channel. It offers a transport, a jog wheel, and insert/send assignment as well. The 003 is also available in a rack mount version. The 003 rack has the same capabilities as the 003, but the control surface is excluded. Before we get into Pro Tools HD, there a few add-ons for Pro Tools LE systems that are worth considering.
Pro Tools LE Upgrades
Digidesign’s Pro Tools LE software is stocked with many great plug-ins. But, as we all know, you can never have enough options. So Digidesign developed a couple upgrades that offer a comprehensive bundle of additional options for Pro Tools LE users.
The Music Production Tool Kit offers an upgrade to 64 tracks of audio, multichannel beat detective, and a killer plug in selection. The plug-ins include TL Space (convolution reverb), Smack (compressor/limiter), Eleven (guitar amp emulator), and a few more great tools.
Digidesign also offers an upgrade package for Pro Tools users who utilize the software for video production. The DV Toolkit offers an upgrade to 64 tracks of audio, Digibase (file management tool), Digitranslator (OMF, AAF, and MXF conversion), and Time Code/ Feet and Frames capability. The upgrade also includes a number of plug-ins, including: DINR (noise reduction), TL Space, and X-Form (TCE and pitch shifter).
Adding a set of high-end audio converters is one of the most effective ways to instantly improve the sonic clarity of your Pro Tools LE Studio, if you utilize outboard recording gear or digital audio devices. The sonic clarity of an external clock source and high-end audio conversion can drastically help take your Pro Tools LE studio to the next level. If this is something you are considering, I suggest trying out a few options to see what sound appeals to you. Some high-end clocks and converters include Apogee, Antelope, Lynx, and Prism.
Pro Tools HD Studio ($10,000 +)
The final option for a Pro Tools studio is Pro Tools HD. Pro Tools HD systems are catered toward the professional audio and video industry. It has become a near necessity for every commercial recording studio to house a Pro Tools HD system. HD set-ups start at around $10,000.
As we outlined earlier, Pro Tools HD hardware operates a bit differently than LE. The processing and audio conversion is integrated into a single interface for LE systems. HD systems utilize Digital Signal Processing cards (DSP) and digital converters. The DSP cards are installed in the PCI slots of the computer. These cards are connected to audio converters via a Digilink cable. There are two steps to purchasing a Pro Tools HD system: Selecting a core system and choosing your interface/s
There are three Pro Tools HD Core systems: Pro Tools HD 1, Pro Tools HD 2 Accel, and Pro Tools HD 3 Accel. The Pro Tools HD 1 system includes one HD Core card. The HD 1 system will support 32 channels of A/D and D/A conversion and up to 96 digital audio tracks.
The Pro Tools HD 2 system offers one HD Core card and one HD Accel card. A HD 2 system is capable of handling 64 channels of conversion and up to 192 digital audio tracks.
The Pro Tools HD 3 system is comprised of one HD Core card and two HD Accel cards. HD 3 systems support 96 channels of conversion and 192 digital audio tracks.
Each of these systems can be upgraded by adding additional cards. If you run out of PCI slots you can connect and expansion chassis to house the extra cards. Once you have your HD Core System, you will need to add a Pro Tools HD I/O interface or third party converter in order to route audio to and from the HD DSP cards.
Digidesign has a number of options for Pro Tools HD interfaces. Lets take a look at the two of their more favored interfaces. The Digidesign 96 I/O is a 16 channel, 24bit/96k audio interface. The 96 I/O offers 8 channels of analog I/O (TRS) and 8 channels of optical I/O (ADAT). It also includes an expansion feature, which allows you to connect multiple interfaces together. The 96 I/O is a good option for HD users who are looking for a basic, overdub/mix set up. If you need more than 8 channels of analog I/O or plan to expand your system in the future, you may want to consider the 192 I/O.
The Digidesign 192 I/O is 16 channel, 24bit/192k audio interface. The 192 I/O has 8 channels of AES/EBU I/O, 8 channels of TDIF I/O, and 16 channels of ADAT I/O. There are a number of expansion card options for the 192 I/O. The AD and DA expansion cards give the 192 I/O the ability to support up to 16 channels of analog I/O. The digital expansion card adds an additional 8 channels of AES/EBU, TDIF and ADAT I/O. The 192 I/O also includes an expansion feature, which allows you to connect multiple interfaces together.
Pro Tools HD systems also support third party I/O interfaces. As we discussed earlier, there are many high-end options for third party converters. Each brand offers its own unique “color” to the audio. I would recommend listening to the different options in order to decide which converters are right for you.
Pro Tools HD Upgrades
A control surface is a great addition to a Pro Tools HD System. Control surfaces are digital mixing boards that provide hands on control of your session. They are set up like an analog mixing board and allow for recording, mixing, and editing functions. Digidesign offers a number of excellent control surfaces, including: C24, D Command, and Icon.
Whether you are just delving into the world of recording or are a seasoned professional, there are many great options for putting together an exceptional Pro Tools recording studio. If you are interested in learning more about Pro Tools, visit www.avid.com. They have documentation, reviews, and videos that offer excellent advice on choosing the right system for your needs and budget.
I hope this article provided you with the information you need to choose the right Pro Tools system for your application . We would love to hear your questions, comments, and feedback! If we can be of any assistance, feel free to drop us a line!
Giovanni-
therecordshop1 (@) gmail.com
Summer NAMM show 2010: Five new products that every artist should know about
The annual summer NAMM show was in Nashville last weekend, so we decided to close up The Record Shop and head downtown to check it out. As you probably know, the city of Nashville has been dealt some pretty rough hands over the past few years. The music retail industry is no exception. Sales have dropped more than 20% over the last year, from $7.1 billion in 2008 to 5.8 billion in 2009. Everything considered, we weren’t sure what to expect as we walked into the downtown convention center. We quickly found that many of the major, “corporate” vendors appeared to be (how to put this politely), lets say, “not that excited about being there.” Luckily we ran into some friends and stuck around long enough to find that there were a number of new companies who still had an optimistic outlook. Companies who weren’t jaded by an economy they can’t control, but excited to talk about how they planned to find their niche in the new market. Here at The Record Shop, we always love hearing about unique products that can help artists reach their full potential. This week, we highlight five companies that have embraced the trends of the modern music industry and developed unique products that are sure to be a hit!
Sonoma Wireworks- Mobile Recording for I Phone
If you’ve ever wished that you could keep a recording studio in your pocket, then you’ll love Guitar Jack! Guitar Jack is an iPhone audio interface developed by Sonoma Wireworks. You never know when inspiration is going to strike. With Guitar Jack you’ll always be prepared to lay it down. Wow, after reading that, I kind of feel like the sham-wow guy! Screw it. I really dig this product. I can’t tell you how many times I’ve had an artist bring in a noisy, mobile recording of a new song, and struggle to figure out exactly how they were playing it. We’ve all heard somebody say, “man I had this killer tune yesterday, but I just can’t remember how it went.” Guitar Jack makes mobile recording quick and simple. The device just plugs into the bottom of your iPhone and integrates with apps such as Recorder, Taylor EQ, and Sonoma’s Four Track. Guitar Jack features a 1/4 inch and 1/8 inch input, as well as a 1/8 inch headphone output.
I had the pleasure of chatting with the Sonoma team during NAMM. When asked how Guitar Jack compares to other devices on the market Sonoma says, “GuitarJack features both a 1/4″ mono jack and an 1/8” stereo jack that can be used simultaneously within FourTrack. Adjusting the analog input level before it is digitized and clipped was one of the most requested features, and with GuitarJack, this is possible with 60dB of input gain and a selectable pad for a total of 72dB of input level control. Additionally, the GuitarJack has selectable hi-z and lo-z impedance on the 1/4″ input allowing for instruments, line level and microphones. Lastly, the GuitarJack is made of hard-anodized aluminum and made in the USA. The quality of craftsmanship and the range of features really make GuitarJack stand out from other interfaces.”
Sonoma also has a comprehensive product line that offers excellent additions to Guitar Jack. Four Track, is a multitrack recording application that allows artists to record on their iPhone. Four Track allows the user to bounce down tracks while building the arrangement. It easily connects to a nearby computer, using its Wi-Fi sync option, to allow users to quickly export their audio. They also offer an eight track version, called Studio Track, that is compatible with the iPad. Users can also utilize their drum loop application, Instant Drummer, to arrange a groove and import into their Four Track session. Overall, Sonoma provides a unique line of products that allows everyone, from the novice musician to a seasoned pro, to easily record their tunes.
If you are interested in learning more about the wide-variety of Sonoma’s products, you can visit their website at sonomawireworks.com
Vie Drive- Content delivery system
Vie Drive is a USB device that incorporates a custom interface which provides a wide variety of interactive content. When the drive is plugged into a computer, the interactive interface immeditley loads, providing fans with instant access to your media. The interface is automatically updated as new content is posted. Some common features include music, video, photos, web links and a calendar. The program also allows the client to sell banner ads to sponsors.
Vie Drive can be used to share any type of media content. From press kits and promotional material, to concert tickets and fan club membership. It is a great way to gain traffic to your sites as well. The device automatically tracks user activity so artists can easily gauge what there fans are most interested in. Another great thing about Vie Drive is its flexibility. Every artist has different needs, so the Vie Drive team works closely with their clients to develop a unique concept that with help them reach their goals.
To hear more about this exciting new product, drop by the website at viedrive.com
Wheat Ware- Eco-friendly accessories
Wheat Ware produces wheat based products in an effort to reduce the use of our world’s forests and natural resources. They offer an impressive line of accessories for musicians., including guitar picks, drum sticks, reeds, and maracas. They feel and play just like their wood and plastic counter parts, but they are 100% biodegradable and non-toxic. Unlike some other crop-based products, Wheat Ware does not use any plastic. Their products are 100% wheat-based and bio-degradable.
You can check out all that Wheat Ware has to offer at wheatware.com
Zip Box- Unique take on digital distribution
Zip Box is a digital distribution company that has taken a unique approach to digital content distribution.
Initially, there didn’t seem to be much of an advantage when compared to competitors such as Tune Core, CD Baby, and Snocap. A Zip Box membership currently starts at $18/month ( normally $38), and includes an additional 25% commission on sales. I asked Paul Wright III (Zip Box Media) how their service was worth the cost. He explained, “It’s all in the content and the data.” As opposed to the I Tunes store, where artists are listed within an endless database of media, Zip Box offers their users a unique, personal website that serves as their store. When a potential buyer clicks on a link to an artists store, they are not distracted by other options, but are provided with a variety of content to browse while previewing the artists material. The Zip Box artist site includes customizable templates, a digital catalog, secure shopping, and secure downloads. Zip Box can also be utilized to distribute text files, software file, images, videos, ringtones, ebooks, midi files, and sample libraries.
In addition to their own unique store, artists are provided with updated data on sales. They can view a detailed breakdown of sales as well a data on specific buyers, demographics, markets, etc. With this information, users can gauge the effectiveness of their promotional strategies and adjust their campaigns accordingly. The site also allows artists to create an automated thank you message that is sent every time someone makes a purchase. This allows artists to maintain relationships with fans, and offer additional content as well. Zip Box’s data feature is a great advantage for independent artists who want to maximize their marketing strategies.
Further information is available at zipboxmedia.com
Mobinek0- Short Run Vinyl Pressing
Mobineko is a British owned CD, DVD, and Vinyl manufacturing company with a factory based in Taiwan. Mobineko offers short run vinyl pressing starting at as few as 50 units. They have a great variety of colors and designs to choose from. Mobineko is a tight-knit group, with about 20 employees that oversee the operation. This gives them the opportunity to interact directly with their clients, so when you call their office you’ll actually be talking with a real person who will be available to assist the client throughout the manufacturing process. Imagine that! They also have an extensive quality and price garauntee on their services. This level of dedication to the genuine support of their clients is hard to come by these days, and makes Mobineko an excellent choice for Independent artists who are looking to take their first run at vinyl releases.
You can learn more at mobineko.com
Have you used any of these products? Have on opinion on how these products will fair in the market?
We would love to hear your questions, comments, and feedback! If we can be of any assistance, feel free to drop us a line!
Giovanni-
therecordshop1 (@) gmail.com
Barry Rudolph Reviews Stuffit Deluxe for Mac
Barry has teamed up with For The Record to share his reviews with the latest in recording products. Barry is a recording engineer/producer and contributing editor for MIX Magazine, ‘New Toys’ columnist for L.A.’s Music Connection Magazine, and writer for www.prosoundweb.com. He also is editor/writer of Gear Lust, his online special review section at www.barryrudolph.com.
I installed the 2009 version of Smith Micro’s Stuffit Utility into my G5 MAC and discovered Drop Stuff, the whole compression side of the seemingly lowly free utility we all used called Stuffit Expander. Drop Stuff is better than ever with a new interface and built-in AES 256-bit encryption.
First of all with Drop Stuff, with its patented 24-bit image compression, has TIFF, PNG, GIF, and BMP compressors and you can compress files by to 98% of their original size (depending what they are). Squash and optimize MP3s, PDFs and images to save hard drive space and time when sending them over the Internet. Even JPEG photo files (an already compressed format) can be reduced up to a further 30%. Drop Stuff creates Stuffit, Zip and TAR archives–you just drop your files and folders on the appropriate icon on the super simple GUI. I liked the Stuff & Burn mode where it stuffs and sends the file to the MAC’s CD/DVD burner in one operation. Sweet!
Expander now expands 7-Zip archives and segmented Zip archives along with files using any of 30 different compression formats–even encrypted Zip archives. I like browsing my archive of files without waiting for expansion using the Stuffit Archive Manager. You can preview thumbnails, add, delete and change files and save searches with Stuffit Collections.
Other cool features you get are: upload directly to FTP, MobileMe, iDisk or multiple CDs or DVD-ROMS, and restore files to original locations Stuffit is Finder-aware so you can preview compressed archives inside MAC’s TimeMachine.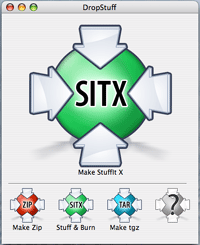
Using Stuffit Deluxe 2009 for MACs is like doubling the size of your hard drive for storing pictures and music. You can put off buying another drive and the work transferring files by buying it for $79.99 as a download from: my.smithmicro.com/mac/stuffit/index.html
Three Reasons Every Artist Should Have A Newsletter
Maintaining a dedicated fan base is one of the most daunting tasks faced by musicians. We all know the importance of social networking, working the press, and promoting shows. If only there was a way to incorporate all of your promotional efforts into one source that could be easily distributed to your target audience. Well guess what? There is! It’s called a newsletter. Newsletters are a simple and effective way to build a “community” around your music, while keeping in touch with your fans on a regular basis. This week we discuss the three reasons why every musician should have a newsletter.
1) Build a real fan base
Want to know the secret to developing a solid fan base (after you write good songs)? Offer valuable content to your fans. David in Portland is probably not going to visit your site just because you sent him a comment about your new song. Now, what if you told David that by signing up for your newsletter he would receive a free download of an exclusive song that you wrote while touring in Portland. I’d bet your odds of a response would be looking much better.
There are many great ways to build your fan base by offering valuable content through a newsletter, but first you will have to develop your mailing list. Incorporating a news letter sign up box on all of your web sites is a great way to start. Offering free content for newsletter members is an effective way to encourage potential fans to sign up.
Unlike a social networking site, where members can join your page with a simple click, your fans will have to share their email address in order to join. Due to the endless amount of spam email’s generated on the web, most people are not likely to give out this information unless they are going to receive valuable content in return. Therefore, an email newsletter gives you the opportunity to connect with fans that have a genuine interest in your music.
2) Stay in touch with your fans
Most artists have a wide variety of viral outlets for their music. There’s myspace, facebook, twitter, youtube, reverb nation, last fm, band camp, just to name a few. If you have spent any time promoting your music on the web, I’m sure you have noticed that it can be difficult to keep your fans interested in all of your pages. Most fans just don’t have the time to browse through every page. With all of the artists out there fighting for attention, it can be difficult to stand out amongst the crowd. One of the greatest advantages of an email newsletter is the ability to share all of your sites and content in one place.
Your newsletter can also be a great way to interact with your fans through fun contests and promotions.Through offering exclusive promotions for newsletter members, you can maintain interest in your music and establish value within your content. You can also build relationships with your fans through incorporating a fan of the week, answering questions from fans, or encouraging them to vote on a poll related to your music. There are endless possibilities for creative fan participation within a newsletter.
Promoting upcoming shows is another effective aspect of an email newsletter. It’s great to post events online and throw up flyers around town to promote a gig. However, with your newsletter you can communicate directly with your core fan base. If you are planning on touring, you can organize your mailing list by region and send out invites to fans in the surrounding areas. With an event posting or flyer, you are limited to the basic details of your show. In a newsletter you have the opportunity to tell your fans more about the performance or offer discounts and giveaways to members who attend.
3) Connect with the press
A newsletter is an excellent way to build rewarding relationships with press and radio. These companies receive countless messages every day from artists who are looking for valuable exposure. If you want a shot at gaining entrance to the gatekeepers of promotion, it is important to offer plenty of valuable content. Mailing a press kit is great, but your banking on the chance that your cd makes it through their endless pile of submissions. If you work on developing a relationship and can make it into the coveted inbox of a writer, you will have the opportunity to maintain their interest with your valuable content.
As we discussed earlier, showcasing valuable content is essential to maintaining your fans interest in your project. This is even more important in connecting with the press. Everybody is releasing new songs and playing shows. The key is to show that what you are doing is notable enough to share with their audience. It is also important to consider how your content could be beneficial to the press. For example, if you are using a product, website, or promotional campaign that has been effective in developing your project you could share your experience and explain how it could benefit their readers.
Once you have received some coverage, you can use your newsletter to share this content with your readers. Through including a link to the article in your newsletter, you can show your appreciation of the press outlet that showcased you project. This method of promotion can go a long way in developing long-term relationships with the press. If you can provide an outlet to draw traffic to a publication, your value to them will greatly improve.
Are you ready to promote your music with a email newsletter? Still wondering if a newsletter is right for you?
We are happy to answer any questions and help you get started in developing your content! Drop us a line…
We work with Constant Contact to create valuable email newsletters for artists and businesses. We are now offering a free trial of the program. Feel free to drop us a line for more information!
As always, we appreciate your feedback!
Feel free to leave us a comment with your thoughts, experiences, suggestions, or anything else you’d like to tell us about!
Want to hear more from The Record Shop? Sign up for our newsletter here…
Barry Rudolph Reviews Crane Song Summing Mixer
Barry has teamed up with For The Record to share his reviews with the latest in recording products. Barry is a recording engineer/producer and contributing editor for MIX Magazine, ‘New Toys’ columnist for L.A.’s Music Connection Magazine, and writer for www.prosoundweb.com. He also is editor/writer of Gear Lust, his online special review section at www.barryrudolph.com.
The two-rack space Crane Song Egret is an eight-channel summing/mixer specifically designed for both straight ahead DAW mixing and composite mixing where both virtual instrument or other audio sources are mixed together with DAW audio tracks. To accomplish this, there is a lot of impeccably built technology packed behind the beak of this bird!
The ultimate aim for an audio equipment designer is purity of sound and to that end Egret works transparently–a pure system that adds no gain or ‘coloration’ to the overall sound. However to satisfy music producers/mixers who depend on their equipment for a certain “je ne sais quoi” quality, Egret also has a Color control knob for each of the eight inputs. It adds (or subtracts–depending on your perception) a certain analog softness to edgy audio sources.
Egret uses eight D/A converters just like those used in Crane Song’s Avocet mastering monitor controller. Supporting rates up to 192kHz, a Cirrus Logic 4398 D/A chip is used along with an 8421 SRC chip (sample rate converter used for input jitter reduction) surrounded by Analog Devices OP275 amplifiers for interfacing to the unit’s discrete Class-A summing and mixing bus circuitry.
There is a front panel switch to disable the SRC for cases where lower latency is required and the Source switch chooses the unit’s digital source between three inputs: AES/EBU (4) XLRS, ADAT Lightpipe, and a third ‘yet to be determined’. Currently the converters and the interface supports AES single wire to 192KHz, ADAT, and S/MUX to 96kHz and can be upgraded as the technology changes. The converters will also independently operate even at different sample rates if required.
Features And Front Panel
Each channel of Egret has a level control, a cue send, and pan control. Each channel also has an analog/digital source button where either the output of the eight-channel analog-to-digital converter or an alternate (eight rear panel TRS jacks) analog balanced line input can be selected. The alternate Analog Inputs could be used for virtual instruments running along with the mix or live sound sources such as in a DJ or FOH mixing application. You could also use them as returns from external processing gear.
To add external processing to any channel in Egret you would send to outboard gear from the direct out (eight rear panel XLRs) and return its output to the analog input. By switching between the digital (actually the output of the D/A converter) and Analog In you could A/B the inserted processing.
There are both solo-in-place and mute buttons on each channel’s line up and a built in Aux send bus with Master level control that works for either a cue system or as an effect send. The headphone monitor jack’s output follows the stereo bus output for a monitor mix when Egret is being used in multi-channel location recording.
Also borrowed from the Avocet’s design is the master bus level control. It’s a Grayhill rotary shaft encoder that drives a microprocessor-controlled bank of relays for super-accurate and repeatable 1dB stepped attenuation. An absolute necessity for recalling mixes, the stereo gain matching is better than 0.05dB.
Egret is built so that the stereo, and cue buses can be chained together to create a many input system. With a special cable, Egret’Äôs bus can be tied to a Crane Song Spider to sum additional analog inputs for complete DAW recording and mixing/interface system.
The Egret Flies
My first test was to reassign the outputs of an “in the box” Pro Tools mix I had already done. I reassigned it into four stereo stems. I wanted to keep my mix the same and compare my stereo mix with the Egret’s analog sum of the stems. I configured Pro Tools’ I/O to send ADAT Lightpipe digital audio out the 9 through 16 ADAT spigot of my Digidesign HD192 interface unit. I set up drums and bass to outputs 9-10, guitars to 11-12, keyboards to 13-14, and vocals plus all effect returns on 15-16. All four Pro Tools stereo master output faders were at 0dB positions (unity).
I ran all eight Egret channel level controls at full CW, appropriately pan odd/even channels let and right, and the Master level at one LED dot below 10. Again like my Avocet volume control knob there are green LEDs ringing the stereo level control to show levels in 1dB steps.
The stereo LED meter on the Egret shows peaks levels at about 2/3 of full scale–obviously Egret has tremendous dynamic range with substantial headroom to spare. I connected my Benchmark Media ADC-1 to convert the Egret mix to digital and sent an AES/EBU signal back to a new stereo mix track in Pro Tools via the AES Enclosure input. Also everything was clocked from the ADC-1.
Since I wanted to check for any differences between my ITB mix summed inside of PT with the Egret’s analog summing, I had to place the same stereo plug-in processing chain on the Egret summed mix back in PT.
The result was both mixes matched closer than I would ever imagine. So does this prove anything? Considering I’m doing two extra conversions: the D/A in the Egret and then the A/D in the Benchmark and applying the same stereo processing, I was surprise that the Egret was this transparent and that the eight channel inputs tracked each stem’s level so exactly. It is a testament to the quality and design of Egret, the quality of the converters used and lastly the accuracy of Pro Tools HD Accel.
So why go through this setup if it ends up sounding about the same? The answer is that you gain more mix control valuable when mastering or supplying stemmed mixes in post-production jobs.
Separate processing of mix stems goes back to George Martin and the Beatles when he would mix their mono singles to a ‘twin track’ (2-track) tape deck with vocals on one channel and the track on the other. In mastering he would compress and EQ the vocals and track differently and recombine them for maximum punch and loudness.
I Go Deeper
So my next test was to apply the same stereo bus processing I put on the entire stereo mix separately to each of the four stems. For this song I had: WAVES’ SSL Stereo Bus compressor followed by the Sonnox Stereo Limiter and followed that with Sonalksis’ SV-517 Stereo EQ. Of course in a big and powerful Pro Tools rig (like mine) this is all easy to do–no need to buy three more hardware stereo EQs, limiters, and compressors you’d need if we were working in Abbey Road studios circa 1965!
I put those plugs all set the same across each of the four stereo stem masters. Immediately the Egret’s stereo master had to come down 5dB with the increased average level jump of each of the stems. The mix was all wrong necessitating new vocal rides, drum sound changes and everything else.
For this to work I would have to start a new mix using this stem configuration. After a little work starting a new mix, I could hear that the vocals took on more clarity especially after readjusting EQ and compression and doing new gain rides. I tried compressing the drums and bass more without affecting the rest of the song’s instruments and vocals. Since my stem masters in PT are automatable, there are loads of creative opportunities with regard to remixing tricks and general mayhem.
I also had a chance to see what the Egret’s Color controls did. It is a very subtle effect most noticeable on electric guitars. It mellows out any abrasiveness in the sound without a big shift in loudness. Applied to all the stems, it is another sonic choice you cannot get in any other way I know of.
I’ll Take Four Please!
So my only wish is for at least four Egrets interconnected for 32 mix channels. I’d set them all the same at unity and all odd/even, left right for standardized recall. Like my Crane Song Avocet and Phoenix TDM plug-ins, the Egret is a big winner for me. All pro all the way, it is one of the most flexible, great-sounding summing/mixing systems I’ve used so far’Äîand I’ve tried a lot of them! It sells for $5,600 and for much more go to: www.cranesong.com/downloads/egret%20data.pdf
Barry Rudolph Reviews SPL DrumXchanger
Recording engineer/producer Barry Rudolph is a contributing editor for MIX Magazine, ‘New Toys’ columnist for L.A.’s Music Connection Magazine, writer for www.prosoundweb.com. He also is editor/writer of Gear Lust, his online special review section at www.barryrudolph.com. Barry has teamed up with For The Record to share his reviews with the latest in recording products.
You can check out Barry’s past articles, reviews and commentaries printed in these journals as well as many other magazines at:
https://www.barryrudolph.com/pages/magazinesdirectory.html
SPL aka Sound Performance Labs is an old hand at level-independent dynamic processing with the invention of the Transient Designer and the Transient Designer plug-in, two of their best products. But the new DrumXchanger drum replacement plug-in might eclipse that triumph. DrumXchanger will replace drum sounds in multi- track sessions no matter the level changes and track dynamics. All drum hits are tracked and replaced including ghost notes, fast fills and rolls. It will do this in real time and in sample phase-accuracy with the original signal.
DrumXchanger comes with a collection of SPL’s high quality 24-bit/96 kHz multi-samples. The library was recorded using SPL preamps and processors and includes three drum kits with one snare, one bass drum and four toms each. Every multi-sample is made up of up to 80 sounds in sixteen dynamic levels and five variations. DrumXchanger will also use .wav sample files as well.
DrumXchanger comes as Native only in RTAS, VST and AU versions for Macs and PCs and features two Transient Designers to process both the original sound as well as the replacement drum sample.
I installed DrumXchanger in my Pro Tools HD 3 Accel rig and was presented with a large GUI that allows for the very precise programming, processing and detection of the original sound for the generation of a triggering signal. Besides the capability of tuning the sample file +/-1 octave in real-time, you can change the phase of the drum sample in relation to the original sound; and externally trigger the sample from an external source via the sidechain input. (DAW program permitting).
Here Are Descriptions Of The Plug-In’s Five Sections As Controlled By Its Excellent GUI.
Section 1–Input
There are four automatable and switchable plug-in setups: A, B, C, and D. These are convenient ways to store complete sets of plug-ins settings and switch between them on the fly. Great for tracking drum performances with very wide dynamics or changes in stick techniques, you can copy and paste your best working setup from one to another and tweak the copy for a special triggering or changing samples as required for certain song sections.
This section has an Input Gain range of +/-15dB for the original drum sound that does not change the triggering level setting. You can tailor the original sound using the high (20Hz to 11kHz) and low pass (20Hz to 20kHz) 12dB/octave filters. The Solo button quickly checks the sound quality of the original.
Section 2–Transient Designer And Ducker
Next comes Transient Designer #1 (of 2) to modify the original drum sound. Just like SPL’s original TD hardware unit and their plug-in, you can alter the attack portion of a percussive sound by +/- 15dB and sustain or ring out portion by +/- 24dB.
A Ducking feature with a range of 0db to -40dB is added here that adjusts the level drop of the original drum sound during the time the sample plays. Ducking sounds like a big compressor squashing down the original sound only momentarily. Pushing the Trigg button “copies” the TD processing to the trigger signal sidechain as well as the original. Reducing the sustain portion (that contains leakage etc.) of the original sound with TD will make for a better triggering action of the sample.
Section 3–Trigger
The Trigger section uses a bandpass filter to precondition the trigger signal. This is a full-range filter starting at 20Hz and going to 20kHz. It has an extreme range of Q values– 0.05 to 50! A Solo button lets you hear the effect of the filter and tuned it to (typically) the basic center and predominate frequencies of most of the energy of the original drum’s sound. Adjusting the Q will refine immensely the trigger performance both in accuracy and speed!
After filtering you may need to readjust the Trigger Gain from 0 to +48dB for proper detection. It is recommended to set the Trigger Gain high enough so the loudest drum hits make the Level meters hit the max peak LED (red light flashing). This guarantees that the loudest sample (of multi-samples) is being played.
The Rim control red arrow ranges from 0-100% and adjusts the level for the individual rim sounds for the included SPL multi-samples of snare and tom sounds. This is to set the desired difference of the rim sounds in relation to the regular drum hits. There is also a Rim knob control to set the input level of all rim samples available in the SPL drum kits.
There are two threshold adjustments in DrumXchanger with two LED peak reading meters. There are two green arrows to adjust triggering threshold–they slide up and down adjacent to these meters. In the default advanced triggering mode, both green arrows’ threshold settings have to be reached for DrumXchanger to play a sample. The green arrows (handles) should be set low enough to ensure triggering but not too low to produce false hits on leakage or crosstalk.
The Ext. SC button activates the side-chain for external trigger such as a recorded drumhead trigger microphone track.
Section 4–Sample
The Sample Section has two parts: sample selection and sample processing. Living up to its name, DrumXchanger’s method of sample selection is one of its best features. The loading, auditioning and playing of any sample from any drive in your system is elegantly handled in this plug-in.
Clicking the Load button allows navigation to the folder where your drum sample .wav files or the .splx files in the SPL Kit folder exists. You virtually load the entire contents of the folder once you navigate to it. For easiest access, I’ve gotten into the habit of copy all my possible drum replacement sample candidates into a “samples” folder and placing it inside each song session folder on my Pro Tools work drive.
I say ‘virtually’ because you are able to step through the list of samples in your folder, using the Next and/or Prev(ious) buttons, and audition each sample using the Play button for when the song is stopped or hear them automatically triggered when the song is playing. This is an incredible feature!
If you select a SPL Kit by clicking on the drumkit icon in the GUI, you get an entire kit of kicks, snares, and toms ready to go–just select the individual drum on the icon and get it now. At some point it would be good if SPL releases a software utility to build your own SPL kits using any samples you like.
All the SPL drum kits offer individual rim sounds for snare drums and toms to be mixed with the sample sounds, and the SPL kit sounds offer 16 velocity levels recorded in 5 variations, summing up to 80 individual hits per drum sound!
The Sample selection section also has a Phase reverse button for flipping the sample’s polarity 180 degrees if you hear cancellation problems. A Delay control adjusts the samples time up to +/- 3.5ms if you perceive double hits on fast rolls and fills.
Lastly, the Dynamics control lets you determine whether DrumXchanger follows the original drum’s dynamics or not–or any amount between these two extremes. You can go from exactly following dynamically and triggering on every ghost note precisely or have the new sample fire the same loudness every time.
Sample Section Processing
The other half of the Sample section processes only the sample(s) you are firing. There are the same high and low pass filters and a Solo button to listen only to the sample. Transient Designer #2 processes the sample and there is +/- 1-octave sample pitch adjustment knob located here.
Section 5–Output
For processing the finished sound–the mix of original drum sound and added sample is the job of the Output section. Again there are the high and low pass filters and the section finishes with a Dry/Wet knob, Output level control and Overload LED.
In the Studio
When mixing Pop Rock and R&B songs here at my Tones 4 $ Studios, I’m often asked to replace or augment the recorded kick and snare sounds. I usually use Digidesign’s DrumReplacer or Drumagog. But not any more!
Invariably when the producer and/or artist come in to take a listen to my mix, they like what I’ve done but want to explore and add some other kick and snare sounds to what I’ve done. I’ve had as many as six different snare samples mixed with the original live kit–don’t ask me why.
With DrumReplacer or Drumagog, I would always record the sample and tweak individual hits here and there because they are late or flam or just be missing in action–not triggered at all. I still like to record my new samples with DrumXchanger but it is a luxury knowing I can recall it and fire a different or an additional sample.
The producers I work with love the auditioning ability of DrumXchanger. Being able to hear any sample fire while the rest of the track plays is awesome. We also like having the Transient Designer and the tuner for exactly dialing in the sample–sometimes that is all that is needed to “marry” a new kick drum sample to the rest of the kit.
On a Rock song with a very ambient drum kit sound–lots of leakage on all the close mics–I wanted to add another snare sample to the piccolo snare. The close snare mic track was full of hi-hat spill and kick drum leakage plus the drummer played a lot of ghost notes and a few fast rolls.
First thing was to slightly filter the snare track using the high/low pass filter in the Input section and then adding a little more attack using the Transient Designer. Reducing the sustain with TD helps tremendously with the hi-hat spill and kick drum leakage but I wish there was a way to use the TD only for the trigger signal.
I used the Trigger section’s bandpass filter to “tuned” to the snare drum’s “box” sound at 874Hz with a Q of 7.74. This killed most of the high and low frequencies so now the kick and hi-hat leakage was nearly gone from the trigger signal.
I chose a Ludwig Black Beauty sample from a folder of snare samples and getting DrumXchanger to follow the original snare drum track on two and four was no problem. By looping song sections, where the drummer played a couple of fills and ghosts, I adjusted the green arrow threshold handles and the threshold controls themselves until DrumXchanger followed all hits perfectly. Since I was going to mix the original with the new sample, if the very first attack of a fast roll doesn’t trigger, it was not the end of the world. I did manage to tweak until even the quieter first strikes fired the sample.
Once I was satisfied with the general operation of the triggering, I copied this setup from A over to B and readjusted B for the touchy areas where I needed more trigger sensitive and/or a lower threshold. These lower settings wouldn’t fly for most of the song without occasional false triggering.
Since you can automate changing from Setup A to B, I went down the song and changed to Setup B for those touchy moments. I was now finished.
When the producer arrived, he didn’t like the sample I used but, since I had already done the work of programming the triggering etc., I just stepped through my snare drum collection until he heard one that worked for him. I adjusted the mix with the Wet/Dry control and moved on with the rest of the mix.
DrumXchanger is now a mainstay in all my mixes! For the first time I am satisfied with the whole drum replacement process! Something I’ve always thought to be extra-tweaky work for usually dubious results and sometimes, uncertain worth. I big, big thumbs up for DrumXchanger! It sells for $449 USD (299 EUR) and for more information visit www.spl.info.
The Top 4 Mistakes Most Musicians Make Online
This week, For The Record features producer/engineer/writer, Tony Rockliff sharing some insight on the common mistakes that musicians make with their online content. Check out indietrak.com/blog for more helpful articles for recording artists.
1) MAILING LIST MISUSE
Sending emails to their mailing list only or mainly when they want to sell something or get people to a gig or other event.
Here’s the bottom line on this – and I can’t stress this enough – your email list is your *most* valuable asset. It’s long been observed that the size of your mailing list and the number of mailings to it majorly determines your income.
What too many don’t know is that in the current marketplace the *nurturing* of the list is now the key factor that realizes that income. And that doing 1) above badly misuses and dramatically weakens the potential value of that list.
Nurturing the list means using the list to continue to freely give valuable and useful information to build trust, respect and affinity.
People on a list that is well-cared for and backed by an honest intention to help the survival of those on it will be much more responsive to what you have to offer, when you do on occasion also offer something for sale.
A list that is misused and the trust violated by only asking people to buy something or go to an event will dry up and eventually your emails won’t even be opened.
There is also precise technology on how to offer products or services for sale in an email that will be welcomed by your list which I’ll go into in a future post.
2) NO REWARD-DRIVEN OPT-IN BOX
On many sites you’ll see a box that says something like, “Join Our Mailing List”. The immediate question asked by visitors is, “Why?”
One of the most important things that your web site should do is get more people to opt-in to your emailing list – but you have to give them a truly compelling reason to do so!
This could be a free MP3 or video of an unreleased track, an eBook of extremely useful information or anything that you feel would be considered really valuable by your public. I you don’t know what that would be – ask them.
Give them a really good reason to give you their email address and they will gladly do so. And you’ll grow your future potential income.
3) WEBSITE STRUCTURE
When a new person comes to a musician’s web site, do they want to read all the bio info or news or gig info for this band that they’ve never heard? No! They actually – and those with egos will need to forgive me – don’t give a darn about *any* of that.
What they’re looking for is that desirable emotional reaction that they get when they listen to music that they like.
But what do most bands do? They have a vanity home page saying, “Look at us, we’re (fill in the blank)”. And where do they have their music? Buried on the 4th or 5th tab over almost as an afterthought – exactly where the bios should be!
If you can win them over with your music, then they may begin to develop an interest in you personally, but until that moment, you need to focus on providing them with the emotional experience that they’re looking for.
A good musician’s or band’s site should have a strong compelling headline and a short, also compelling, introduction designed to get them to listen immediately to your music which should be available right there at the top of the home page – ideally in “sampler” format (30 seconds each of your best 6 songs one blending into the next).
Right next to your music player should be your opt-in email box with your irresistible reward for them giving you their email address.
4) NOT USING KEYWORDS CORRECTLY
I covered this one extensively in my last few articles so won’t repeat the info here, but if you missed those articles you can see them at my blog:
https://indietrak.com/blog
There are more mistakes that people make online, but those above are some of the major ones.
In the next article I will cover insider ways to use Twitter and Facebook successfully.
Tony Rockliff
https://indietrak.com
5 steps to effective internet marketing for musicians
The music business….what can be said that hasn’t been repeated over and over and over again. Let’s skip all the details we’ve been whining about these last few years, and get down to it. Basically, there’s not much room at the top these days. I often wonder, with great uncertainty, if there will ever be another Beatles, Madonna, Michael Jackson, or any of the “superstars” of past generations. Is it just vintage nostalgia that everyone’s favorite rock band is still Zeppelin, or have we reached a point where the focus on “commercial appeal” has resulted in a mass audience that has the attention span of my dog? (shout out to Jops!)
I don’t think anyone has the ultimate answer. (If you think you do, leave us a comment!). However, there is one thing that we can all agree on. Music is a product. In order for a business (the artist) to sell their product, they must market it effectively. Viral marketing is an essential aspect of a comprehensive marketing plan for artists. This week we lay out 5 steps to effective internet marketing for musicians.
Before you can develop an effective viral marketing campaign, it is important to understand the importance of offering quality content. In their book, Inbound Marketing, advertising guru’s Brian Halligan and Dharmesh Shah, call this process “creating remarkable content.” The idea is that viral marketing is far more effective when the business develops an original strategy that is “remarkable” enough for the consumer to share with others. Twitter has proven that, in some cases, what you ate for lunch can prove to be remarkable content. However, this is only true if you are already a high profile figure. For the rest of us, success in the online domain rests in our ability to create our own, unique content. Once you have developed a creative marketing plan, that stimulates continued interest in your project, implementing the following strategies will become far more effective.
Note- For this article, we’ll assume that you have already developed professional social network profiles and a website. For more information on design, check out our blog: Why do I need a professional website…
1. Social Network Marketing: Build Your Core Fanbase
There are over 8 million music profiles on Myspace. Want to know how you can make like Waldo and stand out in the crowd? Build a core fan base. Mass friend requests are not an effective way to build real fans. Sure your stats will look great, but are they going to buy your record, probably not. Start by inviting friends that fit your target demographic. (age, location, interests, etc) Rather than just adding them to the page, include a personal message. Provide an incentive for them to visit your site, other than “check out my music.” People love getting stuff for free. Use this opportunity to show your appreciation of their support by offering some form of free content (download, ringtone, e-book, etc). Once you have developed your core fan base, make sure you give them a reason to check back on a regular basis.
Here is a list of important updates:
Personal messages Daily status updates New songs New pictures Consistent blog entries NewsAs you develop a steady stream of media, remember that your goal is to create “remarkable content.” Rather than asking fans to buy your new song, write a blog on how the song came about, or a fun story from the studio. Providing your fans with a personal experience will give them a way to relate to you and your music. If you take the time to utilize these techniques on a regular basis, you will be on your way to developing a dedicating fan base that will support your efforts and, most importantly, tell their friends!
Popular Social Networks:
Facebook Myspace Twitter Bebo 2. Blog, Newsletter, Live chat: Develop your communityEveryone loves to be “part of the group.” If you provide a medium to interact with your fans on a personal level, you will be able to build a community that everyone wants to be a part of.
Creating a blog is a great way to start building your online community. Once you have developed your blog page, embed your blog on your website to make it easy for fans to find. Once again, creating remarkable content is an essential aspect to the success of your blog. It is also important to urge your fans to leave comments and suggest topics for your blog. By providing your fans with a fun way to interact on the site, you will build a personal experience that will help develop your community.
Popular blog sites:
Word Press Blogger TypePad SquareSpaceSending out an e-mail newsletter is another excellent tool to engage your fans. Make sure your newsletter sign-up is easy to find on your website and social networks. Giving away free content for newsletter subscribers will help boost your submissions. Your newsletter should include news, pictures, excerpts from your blog, contests, etc. Offering creative ways for your fans to be a part of your community is key.
(We use Constant Contact for email marketing. Their site is easy to use and offers excellent services at affordable rates. For more information on setting up your email marketing account, drop us a line at therecordshop1@gmail.com)
Live video chatting is a new trend that has beecome very successful for artists in developing their community. Stickam.com is one of the more popular sites for this application. Live video is a great way to build relationships with your fans. It is much more personal than the other methods because your fans get a chance to actually interact with you in “person.” You can give them a behind the scenes look at rehearsals, studio sessions, and shows. Other popular concepts include: Q&A sessions, online performances, and sessions on the road. Keep in mind that, unlike blogs, your fans “see” everything on live video. It is important to maintain a strong image and attitude when the camera is rolling.
3: Video content: Build your visual presence
As we have discussed throughout this article, it is important to personalize your marketing strategy. While many of us have become accustomed to communicating on the web, visual interaction is still an integral aspect of developing relationships with fans. Since the first video of a cat jamming on the piano, viral videos have been a leading source of online entertainment. You Tube is the clear frontrunner for viral videos. However, sites like Myspace Video, Vimeo, Metacafe, and Daily Motion are also worthwhile platforms to promote your content.
Building your visual presence through viral video is a exceptional method for promoting your music. Once again, the emphasis on remarkable content is important to consider as you develop your viral presence. Remember, you want to offer something different than everyone else. Performance videos are great, but should be supported with other unique concepts. So pick up a camera, hire a videographer, and keep it rolling. You never know when something remarkable is going to happen.
Here is a list of suggestions for viral videos:
Live Shows (with quality audio and a good crowd) Clips from studio sessions Interviews Exclusive performances (shot specifically for your video stream) Tour video blog Contest for viewer submitted video reponses4: Online Media Promotion: Build relationships with the press
Now that you have built your fan base, community, and visual presence, its time to meet the press. Writers are flooded with countless requests from bands everyday. In order to get their attention, you have to take the time to build real relationships.
The local press is a good place to start. Your town probably has a local music zine and several community newspapers that cover local music. Call the office or visit the website to find out who chooses featured artists. Rather than just mailing in a press kit, share your interest in their work. Show your support at their events or on their blog. Through supporting their efforts and networking with their team, you will have the opportunity to build a relationship with the publication. Once you have developed a repoir, invite them out to a show or set up a casual lunch meeting. If you have followed the previous steps, you will be able to provide plenty of remarkable content that will hopefully gain their interest in supporting your project.
Online review sites are also a great resource, but even more difficult to break in to. In this case, rather than competing with your local community, you are up against every other artist on the web. Fortunetaly, you have developed your online presence and understand the importance of building relationships. Just be patient, these sites receive endless requests from artists. Most of them will get back to you eventually, but if you send them a message every day, your likely to get black listed.
The Indie Bible is an excellent resource for online press publications.
5:Internet Radio: Increase your exposure
Internet radio is one of the fastest growing, online promotional resources for artists. There are thousands of broadcasts on countless sites. Taking advantage of this opportunity is the final step in solidifying your comprehensive online marketing plan. Achieving substantial radio exposure takes creativity, time, and a lot of dedication. When done correctly, it can make the difference between making music and making a living making music.
In order to build your relationships with DJs, music directors, and radio promoters, you can use the techniques we discussed in the previous section. You’ll find that stations will be much more supportive of promoting you, if you have a method to promote them. Try offering a promotional campaign that advertises their station, inquire about ad space, and show your support by plugging their broadcast on your sites.
Once you begin to build these relationships, nuture them carefully. While you want to keep them up to date, you don’t want to overwhelm them with information. Invite them to sign up for your newsletter or blog so they can choose to stay up to date with your project. A monthly call, or email, to touch base and offer your support can also be effective.
Here is a list of the top internet radio stations:
Pandora.com Live365.com Slacker.com Jango.com NPR.org Shoutcast.com Radiotower.com Streema.comThe Indie Bible is an excellent resource for online radio stations.
So there you have it. The 5 steps to effective internet marketing. Now its time to get to work! Remember, the three keys to following these steps are consistency, remarkable content, and…..consistency.
I hope this article provided you with the information you need to developing your online marketing plan . We would love to hear your questions, comments, and feedback! If we can be of any assistance, feel free to drop us a line!
Giovanni-
therecordshop1 (@) gmail.com
What is the best recording program?
Flimingo Productions: I’ve used cubase 4,pro tools le and sonar 8 producer edition to record and i was wondering in your opinion,which is the most user friendly and best program to use?
Giovanni:
Thanks for your question! Deciding which DAW is more “user-friendly” is really a matter of preference and application. They are all worthy recording applications. When used with high end audio conversion, each one can produce professional results. The type of music you produce can also play a big part in which program is “best.” Pro Tools is usually favored for sessions where extensive arrangement and editing is needed. Their editing capabilities are very user friendly and fast. For sessions with a lot of midi programming, Logic is often a first choice. Their sound engine is designed to support a ton of virtual processing and their bussing system (how each track is combined into the main stereo track) is believed by many to be far superior of most DAW’s. Sonar, Neuendo, and Cubase were once considered the “consumer” DAW’s by most professionals. However, these programs have stepped their game up and offer a great all around recording platform. Some engineers prefer these applications due to their comprehensive support of third party products, plug-in stability, and console/analog “feel.”
We use Pro Tools HD and Logic Pro, powered by Apogee Converters. I have worked in studios that utilize every DAW and these are the two that I personally prefer. While other DAW’s have become more popular, Pro Tools is still widely considered the “industry standard” In order to accommodate the majority of the market, it is necessary for a major recording studio to offer a Pro Tools HD rig. The ability to edit and arrange quickly using quick keys (no pun intended) is another big reason I prefer the program. I use Logic as my main sequencing/programming DAW. It has a great selection of built in sounds, supports all of my virtual instruments, and is very stable. Logic has recently improved their editing and drum quantization processes. Combined with a revered bussing system, they are really giving Pro Tools a run for their money.
It’s great browse google and review everyones opinion on their favorite DAW. You could listen to me talk for days on what I prefer. But in the end, the only way to really judge which program is most “user-friendly” for you is by learning how to use each one and deciding for yourself.
I hope this article provided you with the information you need to take the next step in choosing the recording program that is best for you. . We would love to hear your questions, comments, and feedback! If we can be of any assistance, feel free to drop us a line!
Giovanni-
therecordshop1 (@) gmail.com
Choosing a Pro Tools system for your studio
Pro Tools, AVID/Digidesign’s benchmark digital recording software, is synonymous with the production of hit records. Since its introduction into the professional recording industry in the mid 90’s, Pro Tools has remained a frontrunner for audio production. When Pro Tools was introduced in 1991, four channels of audio were available at a price tag of $6000. Thankfully for us, Pro Tools’ capabilities continued to grow alongside the steady advancements of computer technology. As the audio industry began to stray away from major recording facilities, into home studios and bedrooms, Digidesign began developing Pro Tools systems that catered to all levels of audio production. Today, Digidesign offers Pro Tools systems affordable on nearly any budget. In this article, we take an in depth look at three levels of Pro Tools studio systems: The M-Box studio ($250-$1000), The 003 studio ($1200-$2,500), and the HD studio ($10,000+). We will also discuss some important add -on’s that can be a great addition to any Pro Tools System. These include, system upgrades, a master clock source, converters, and control surfaces. First, let’s check out the hype behind the Pro Tools software and the advancements in Digidesign’s latest version, Pro Tools 8.
Introduction To Pro Tools
Pro Tools is a Digital Audio Workstation (DAW). A DAW is comprised of two elements, audio recording software and audio conversion hardware. The software allows for recording, editing, mixing, and midi arrangement. The hardware provides analog to digital and digital to analog conversion of the audio. Pro Tools LE software requires a Digidesign hardware interface in order to operate. Pro Tools HD utilizes Digidesign PCI cards for processing and uses a separate hardware device for conversion.
The Pro Tools workspace is comprised of two main windows. Mix and edit. The mix window contains a vertical channel strip for each track in the session. It is set up much like a typical mixing console. Each channel has inserts, busses, input/output selections, a pan pot, record enable, solo, mute, and a fader. The edit window contains the same options as well as waveforms for each track in the session. The edit window allows you to view the waveforms for each track, edit and arrange the audio, as well as set up markers, and control the transport (play, stop, rec, etc). The editing workflow is one of the most impressive aspects of the software. There are several tools and editing modes that make editing and arranging a breeze. Pro Tools offers a number of playback and record options as well. These include: loop playback, punch record, and loop record. The software also provides comprehensive midi and video capabilities.
In the latest version of the software, Pro Tools 8, Digidesign maintained their user-friendly workflow that helped to make the software an industry standard. There are several new features such as elastic audio, the off spring of the popular audio quantization application, Beat Detective. They have also added more tracks for LE systems (48 mono or stereo), several virtual instruments and plug-ins, and a hip, new design for the workspace. Now, lets take a look at the options for Pro Tools studio set-ups.
Mbox Series ($250-$700)
The Pro Tools Mbox series hardware is a great option for those who are looking for a simple, portable device for recording. The price for these interfaces range from $250 to $700 and includes the latest Pro Tools Software. The latest Mbox hardware consists of the Mbox 2 micro, Mbox 2 Mini, Mbox 2, and Mbox 2 Pro.
The Mbox 2 Micro is a 24bit/48k, output only USB device that is about the size of a jump drive. It was designed for engineers who want the ability to work on sessions anywhere. There are no inputs on the device. It is equipped with a 1/8″ jack for monitoring.
The Mbox 2 Mini is 24bit/48k, 2 channel USB interface. It is a great option for new Pro Tools users or songwriters who want a simple device for basic recording applications. The Mbox 2 Mini is equipped with one XLR input with 48v phantom power, two 1/4″ inputs, two 1/4″ outputs, a headphone output, and combined volume control. There are a few downsides of the Mini. It does not include a midi I/O or separate volume controls for monitor and headphone outputs.
The Mbox 2 is a 24bit/48k, 4in/2out USB interface. It offers a few more features than the mini. It is a good choice for someone looking for a basic interface that includes midi capability and more extensive input options. The Mbox 2 features two preamps with 48v phantom power, two analog inputs (XLR or 1/4″), two digital SPIDIF inputs, two 1/4″ outputs, midi I/O, a headphone output and separate volume controls for monitors and headphones.
The final piece in the Mbox series is the Mbox 2 Pro. It is a 24bit/96k, 6in/8out fire wire interface. The Mbox 2 Pro is a great buy for beginners looking to get into more advanced sessions and professionals who need a reliable device for remote recording. It offers two preamps with 48v phantom power, four analog inputs (XLR or 1/4″), two digital SPDIF inputs, six 1/4″ outputs, midi I/O, two headphone outputs, and separate volume controls for monitors and headphones.
The M Box series hardware is a solid option for mixing on the run, portable recording, and basic demo sessions. However, if you are looking for a more advanced device with the ability to handle larger sessions, the Digidesign 003 could be what you are you are looking for.
Digidesign 003 Series ($1200-$2500)
The Digidesign 003 is 24bit/96k, 16 channel Pro Tools interface. It can be found in countless project studios, as well as the B rooms of several major facilities. It is an effective workhorse, offering a wide range of amenities for those not ready to take the leap to HD. The 003 interfaces range from $1200-$2500.
The 003 provides four pre amps with 48v phantom power, 4 XLR inputs, 4 1/4″ inputs, 8 1/4″ outputs, 2 1/4 monitor outputs, 8 channels of adat I/O, word Clock I/O, midi I/O, two headphone outputs, and separate volume controls for headphones and monitors. The 003 also includes 8 motorized faders, led/lcd displays, solo, mute, record enable, and pan knobs for each channel. It offers a transport, a jog wheel, and insert/send assignment as well. The 003 is also available in a rack mount version. The 003 rack has the same capabilities as the 003, but the control surface is excluded. Before we get into Pro Tools HD, there a few add-ons for Pro Tools LE systems that are worth considering.
Pro Tools LE Upgrades
Digidesign’s Pro Tools LE software is stocked with many great plug-ins. But, as we all know, you can never have enough options. So Digidesign developed a couple upgrades that offer a comprehensive bundle of additional options for Pro Tools LE users.
The Music Production Tool Kit offers an upgrade to 64 tracks of audio, multichannel beat detective, and a killer plug in selection. The plug-ins include TL Space (convolution reverb), Smack (compressor/limiter), Eleven (guitar amp emulator), and a few more great tools.
Digidesign also offers an upgrade package for Pro Tools users who utilize the software for video production. The DV Toolkit offers an upgrade to 64 tracks of audio, Digibase (file management tool), Digitranslator (OMF, AAF, and MXF conversion), and Time Code/ Feet and Frames capability. The upgrade also includes a number of plug-ins, including: DINR (noise reduction), TL Space, and X-Form (TCE and pitch shifter).
Adding a set of high-end audio converters is one of the most effective ways to instantly improve the sonic clarity of your Pro Tools LE Studio, if you utilize outboard recording gear or digital audio devices. The sonic clarity of an external clock source and high-end audio conversion can drastically help take your Pro Tools LE studio to the next level. If this is something you are considering, I suggest trying out a few options to see what sound appeals to you. Some high-end clocks and converters include Apogee, Antelope, Lynx, and Prism.
Pro Tools HD Studio ($10,000 +)
The final option for a Pro Tools studio is Pro Tools HD. Pro Tools HD systems are catered toward the professional audio and video industry. It has become a near necessity for every commercial recording studio to house a Pro Tools HD system. HD set-ups start at around $10,000.
As we outlined earlier, Pro Tools HD hardware operates a bit differently than LE. The processing and audio conversion is integrated into a single interface for LE systems. HD systems utilize Digital Signal Processing cards (DSP) and digital converters. The DSP cards are installed in the PCI slots of the computer. These cards are connected to audio converters via a Digilink cable. There are two steps to purchasing a Pro Tools HD system: Selecting a core system and choosing your interface/s
There are three Pro Tools HD Core systems: Pro Tools HD 1, Pro Tools HD 2 Accel, and Pro Tools HD 3 Accel. The Pro Tools HD 1 system includes one HD Core card. The HD 1 system will support 32 channels of A/D and D/A conversion and up to 96 digital audio tracks.
The Pro Tools HD 2 system offers one HD Core card and one HD Accel card. A HD 2 system is capable of handling 64 channels of conversion and up to 192 digital audio tracks.
The Pro Tools HD 3 system is comprised of one HD Core card and two HD Accel cards. HD 3 systems support 96 channels of conversion and 192 digital audio tracks.
Each of these systems can be upgraded by adding additional cards. If you run out of PCI slots you can connect and expansion chassis to house the extra cards. Once you have your HD Core System, you will need to add a Pro Tools HD I/O interface or third party converter in order to route audio to and from the HD DSP cards.
Digidesign has a number of options for Pro Tools HD interfaces. Lets take a look at the two of their more favored interfaces. The Digidesign 96 I/O is a 16 channel, 24bit/96k audio interface. The 96 I/O offers 8 channels of analog I/O (TRS) and 8 channels of optical I/O (ADAT). It also includes an expansion feature, which allows you to connect multiple interfaces together. The 96 I/O is a good option for HD users who are looking for a basic, overdub/mix set up. If you need more than 8 channels of analog I/O or plan to expand your system in the future, you may want to consider the 192 I/O.
The Digidesign 192 I/O is 16 channel, 24bit/192k audio interface. The 192 I/O has 8 channels of AES/EBU I/O, 8 channels of TDIF I/O, and 16 channels of ADAT I/O. There are a number of expansion card options for the 192 I/O. The AD and DA expansion cards give the 192 I/O the ability to support up to 16 channels of analog I/O. The digital expansion card adds an additional 8 channels of AES/EBU, TDIF and ADAT I/O. The 192 I/O also includes an expansion feature, which allows you to connect multiple interfaces together.
Pro Tools HD systems also support third party I/O interfaces. As we discussed earlier, there are many high-end options for third party converters. Each brand offers its own unique “color” to the audio. I would recommend listening to the different options in order to decide which converters are right for you.
Pro Tools HD Upgrades
A control surface is a great addition to a Pro Tools HD System. Control surfaces are digital mixing boards that provide hands on control of your session. They are set up like an analog mixing board and allow for recording, mixing, and editing functions. Digidesign offers a number of excellent control surfaces, including: C24, D Command, and Icon.
Whether you are just delving into the world of recording or are a seasoned professional, there are many great options for putting together an exceptional Pro Tools recording studio. If you are interested in learning more about Pro Tools, visit www.avid.com. They have documentation, reviews, and videos that offer excellent advice on choosing the right system for your needs and budget.
I hope this article provided you with the information you need to choose the right Pro Tools system for your application . We would love to hear your questions, comments, and feedback! If we can be of any assistance, feel free to drop us a line!
Giovanni-
therecordshop1 (@) gmail.com
Studio Tips: Three steps to effective pre-production
One of the most exciting aspects of my job is having the opportunity to do something new everyday. Running a recording studio in Nashville, I have been privileged to work on an eclectic range of projects. While every record requires a unique approach, detailed preparation is consistently a key element of the process. This week, we take a look at the basic elements of effective pre-production.
Demos: Keep it simple
There is a common saying in the music industry that you can tell you have a great song when you can strip it down to the most basic elements and it still resonates with the listener. Recording a basic demo, or “work tape,” is an important step in choosing the right songs and preparing for the studio.
Many songs can be effectively demoed with a guitar/vocal or piano/vocal arrangement. For bands, recording a rehearsal is a great way to capture the raw vibe of the tunes. When recording your initial demos, remember to keep it simple. The “vision” of the material will often evolve during pre-production. You may also find that some revisions are necessary, in order to maintain cohesiveness within the record. A basic demo will provide you, and the producer, with a fresh canvas to outline the direction of the project.
If you plan on performing to a metronome (click) in the studio, it is wise to record your demo with one as well. Not only is it good practice, but once you begin your demo recording, it is important to lock in the “feel” of the song by finding the right tempo. Once you complete the demo process, the next step is to define your sound.
Define your sound: Choosing your colors
Throughout the process of writing your material, working out arrangements, and recording your basic demos, you have already begun to develop the vision for your songs. In order to define the overall vibe of your record, you’ll want to begin an in-depth analysis of your tunes and outline the basic elements of your sound.
You can start by defining the “sonic character” of your record. I refer to this as the combination of instrumentation, tone, space, depth, and vibe. For example, if you are recording a rock project you may want a heavy drum sound, wide guitars, in your face vocals, and a “live feel.” A pop-country ballad might call for clean drums, warm guitars, and smooth vocals. Every genre has its basic elements. Developing your spin on the style is an essential aspect of pre-production. However, it can be helpful to analyze recordings that influence your music. Try to use recordings that directly relate to the sound and vibe that you’re after. These “reference tracks” will be an excellent starting point for your production and arrangement.
The next step is choosing the instrumentation. Listen through your demos and make a list of the instruments required for each song. It will be helpful to make notes of the desired “tone” for each element as well.
You will also want to begin working out the arrangement. You may find that dropping out, or adding, a section will improve the flow of the song. Where the instruments are introduced, or cut, out can also make a big difference in the dynamics of the arrangement. If you are after a “commercial” production, you may need to revise your arrangement to follow the basic structure of the genre. It is important to maintain your artistic integrity, but there are times where a little compromise can make a song more commercially viable. In most cases, finding a good balance between following the format and maintaining originality is the way to go.
As you outline the elements for each song, it is important to keep the “big picture” in mind. While we live in a time where the single is king, cohesiveness between your songs plays a big part in defining your sound and making a great record.
Rehearsal: Get it right before you go red
Great recordings come from great performances. One of the keys to an exceptional record is capturing the moment where the emotion is flowing and everything comes together just right. There is nothing that kills the excitement of recording more than trying to figure out the right part in the middle of a session. Taking the time to work out the songs, before your step in the studio, will allow you to focus your energy on the vibe of the recording.
If you plan on recording to a click, it is important to rehearse with one as well. Since you played to a click on your initial demos, it will be easier to incorporate this into rehearsal. It helps to send the click to a pair of headphones for the drummer, as well as running it through the PA. If possible, try recording your rehearsals for reference.
Start by playing through the songs until everyone is comfortable with the tempo and their parts. Once you have the performance down, you can listen back to your recordings and see if there are any revisions that could be benefitial to the arrangement. Don’t be scared to experiment with additional parts, breakdowns, etc.
Once you’ve got the performances down, take some time to try out different tones to see what works best for each song. A different instrument, amp, or drums can add some flavor to the various tunes. This will also save you time when your dialing in the sounds in the studio.
Now that you have everything locked in, make note of your tones and record the final rehearsal. It will be helpful to listen to these tracks during the time leading up to your recording. This can also be a great reference during your sessions. If you are bringing in any sessions players for the record, be sure to give them a copy of your final demos so they can get to know the songs.
Effective pre-production takes plenty of time and patience. However, if you take the time to get it right before the light goes red, your record will thank you.
I hope this article provided you with the information you need to get started with pre-production. We would love to hear your questions, comments, and feedback! If we can be of any assistance, feel free to drop us a line!
Giovanni-
therecordshop1 (@) gmail.com